소개
프로그래밍 언어 수업 실습 시간에는 OCaml 언어를 사용합니다. 지금까지의 Python 언어와 다르게 Functional Programming Paradigm을 따라서 프로그래밍하게 됩니다. 이를 위해 assignment statements, loops, classes 그리고 objects를 사용하지 않습니다.
OCaml은 statically-typed and type-safe합니다. 즉, compile time에 type error를 찾을 수 있고, type마다 가능한 operation이 제한되어 있습니다. Python은 type safe하지만 dynamically typed합니다. 즉, run-time에서야 type error를 찾을 수 있습니다.
OCaml 설치
실습을 위해 OCaml 설치를 진행합니다. 아래 안내글은 윈도우를 기반으로 작성되었습니다.
1. WSL (Windows Subsystem for Linux) 설치
- 파워쉘을 관리자 계정으로 연다.
- wsl –install 입력; Ubuntu (22.04)을 설치하게 됩니다.
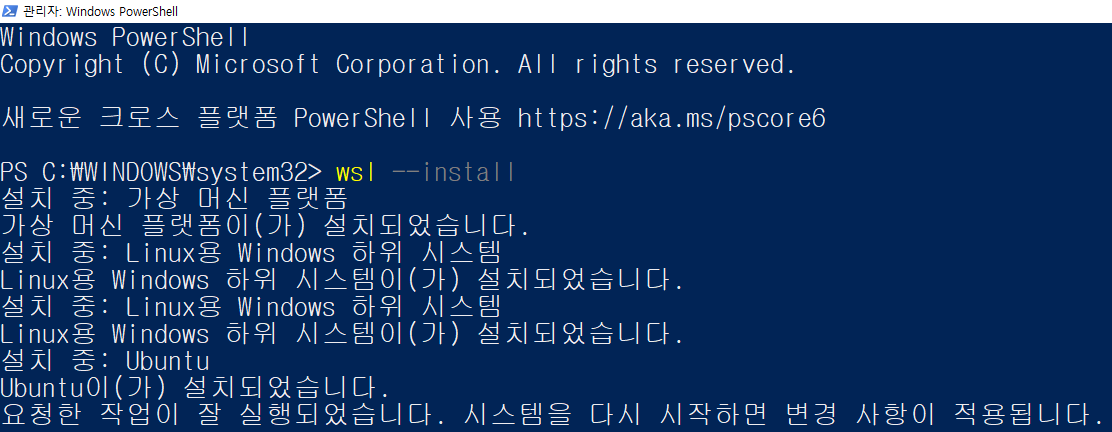
- 컴퓨터를 재시작합니다.
- 문제가 발생하면 토글을 열고 문제를 해결하세요.
-
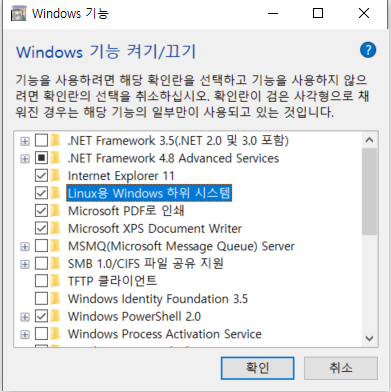
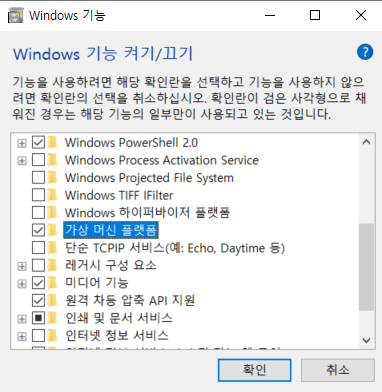
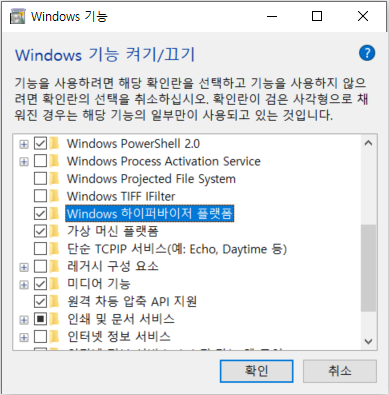
WSL 문제 해결 (0x80370102)

- Virtual Machine Platform Windows feature
- virtualization in the BIOS

-
WSL 문제 해결 (0x8000000d)

- PowerShell을 관리자 모드로 연다.
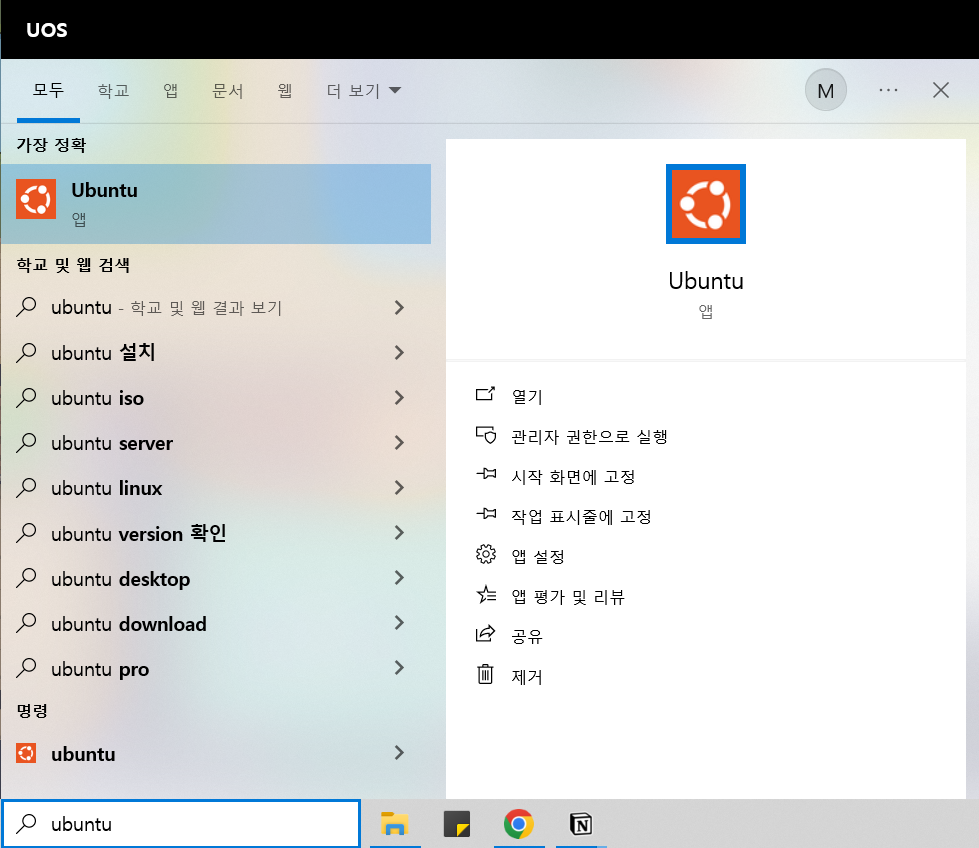
wslconfig.exe /u ubuntu명령어를 입력한다.- Ubuntu를 실행한다.
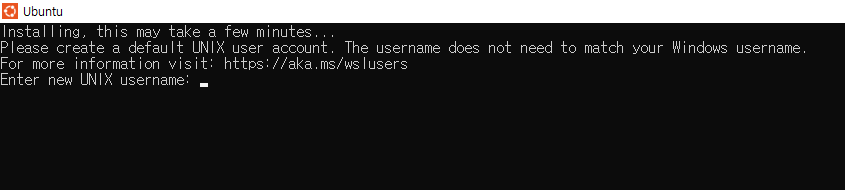
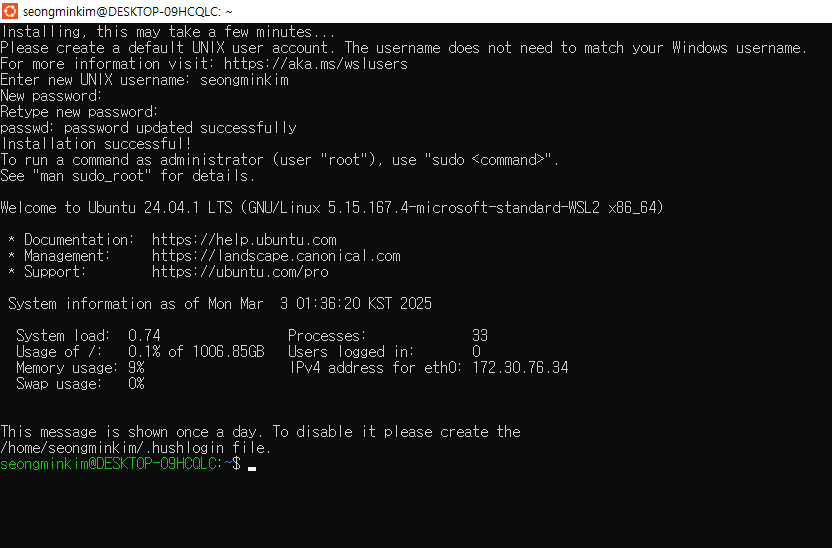
-
- UNIX 계정을 생성합니다.
2. A Unix development environment 설정
-
APT package manager를 활용하여 A Unix development environment를 설정합니다.
 sudo apt update
 sudo apt upgrade -y
 sudo apt install -y zip unzip build-essential
3. OPAM (OCaml Package Manager) 설치
- OPAM은 Python의 pip과 유사한 역할을 수행합니다.
sudo apt install opam
opam init --bare -a -y
opam update
4. OPAM switch 설정
- OPAM switch는 Python의 venv와 유사한 역할을 수행합니다. OCaml compiler와 packages를 관리합니다.
- 이 수업에서 사용할 switch인 ai20049를 생성합니다.
opam switch create ai20049 ocaml-base-compiler.5.2.0
eval $(opam env --switch=ai20049)
opam install -y utop odoc ounit2 qcheck bisect_ppx menhir ocaml-lsp-server ocamlformat
5. Visual Studio Code 설정
-
WSL extension을 설치한다.

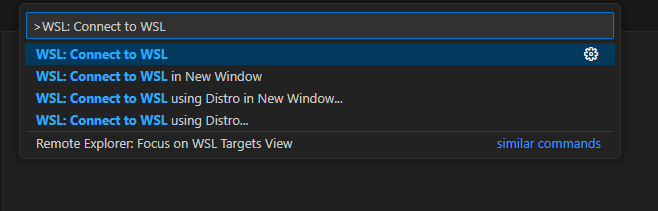
- Ctrl + Shift + p로 Command Palette를 연다.
-
WSL: Connect to WSL에 연결한다.
-
OCaml Platform을 설치한다.
-
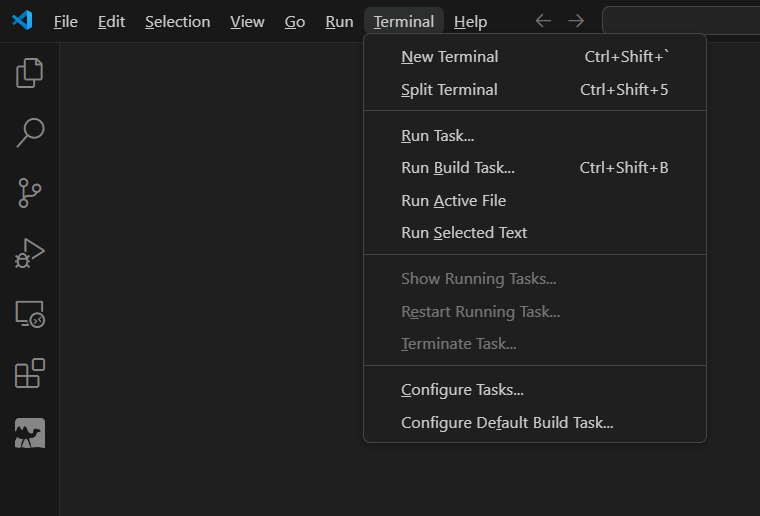
New Terminal을 연다.
-
utop을 입력합니다.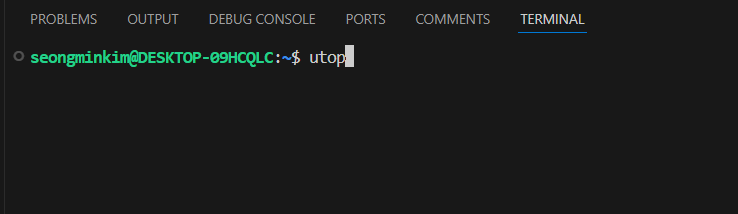

OCaml Universal Toplevel
이번 OCaml tutorial 세션에서는 utop을 사용합니다. utop은 Python의 IDLE와 같이 read-eval-print-loop (REPL)을 수행합니다. utop을 종료하기 위해서는 Ctrl-D나 #quit;;를 입력합니다. utop에서 expression은 double semicolon ;;으로 끝냅니다. 아래 코드 블록에서 42라는 expression을 입력했고 그것을 OCaml이 해석한 것을 아래에 보여줍니다. OCaml은 입력한 값이 이름이 지정되지 않은 int type 42라고 해석합니다.
utop ### 42;;
- : int = 42
let definition을 사용하여 value에 이름을 지정해 줄 수 있습니다. value x는 42 값을 가지는 int type이라는 것을 알 수 있습니다.
utop ### let x = 42;;
val x : int = 42
함수는 다음과 같이 정의할 수 있습니다. OCaml에서는 함수는 42와 같은 value입니다. value increment는 int type을 입력으로 받아서 int type을 출력하는 type을 가지는 function이라는 것을 알 수 있습니다.
utop ### let increment x = x + 1;;
val increment : int -> int = <fun>
OCaml에서는 함수를 아래와 같이 apply할 수 있습니다. OCaml coding convention에서는 괄호가 필요하지 않다면 적용하지 않는 것을 선호합니다. 그렇기에 increment 21이 increment(21)보다 선호됩니다.
utop ### increment 0;;
- : int = 1
utop ### increment(21);;
- : int = 22
utop ### increment (increment 5);;
- : int = 7
utop에서 다른 파일을 불러올 수 있습니다.
mycode.ml이라는 파일을 만들고 아래 코드를 작성합니다.
let inc x = x + 1
utop에서 mycode.ml을 load하고 사용할 수 있습니다.
utop ### #use "mycode.ml";;
val inc : int -> int = <fun>
utop ### inc 3;;
- : int = 4
utop이 익숙해질 때까지 자유롭게 실습해봅니다. Python Interpreter와 어떤 것이 다른지 생각해봅니다.
Compiling OCaml Programs
Python과 마찬가지로 REPL 형식으로는 간단한 프로그래밍 이상을 수행할 수 없습니다. 이번에는 코드를 파일에 저장하고 compile하는 법을 알아봅시다.
터미널을 열고 hello-world directory를 만듭니다.
seongminkim@DESKTOP-0RHBQDL:~/ai20049$ mkdir hello-world
seongminkim@DESKTOP-0RHBQDL:~/ai20049$ cd hello-world/
seongminkim@DESKTOP-0RHBQDL:~/ai20049/hello-world$
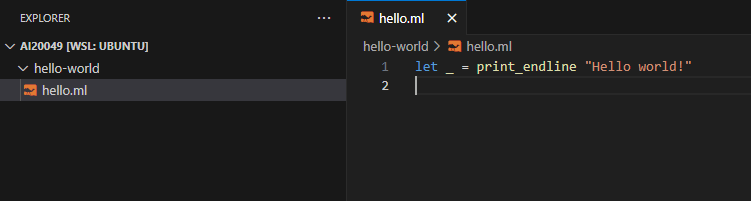
hello.ml이라는 파일을 만들고 아래 코드를 입력합니다.
터미널에 아래 명령어를 입력하여 코드를 컴파일합니다.
ocamlc 컴파일러에게 hello.byte라는 이름으로 output file을 출력하게 합니다.
seongminkim@DESKTOP-0RHBQDL:~/ai20049/hello-world$ ocamlc -o hello.byte hello.ml
seongminkim@DESKTOP-0RHBQDL:~/ai20049/hello-world$ ls
hello.byte  hello.cmi  hello.cmo  hello.ml
seongminkim@DESKTOP-0RHBQDL:~/ai20049/hello-world$ ./hello.byte
Hello world!
seongminkim@DESKTOP-0RHBQDL:~/ai20049/hello-world$
Dune Build System
Dune build system을 사용하면 위 과정을 더 쉽게 진행할 수 있습니다. hello.ml 코드랑 같은 폴더에 dune 파일을 만들고 아래 코드를 입력하세요. 이는 Dune에게 hello라는 실행 파일을 생성하게 합니다.
(executable
 (name hello))
dune-project라는 파일을 만들고 아래 코드를 입력하세요.
(lang dune 3.4)
이는 Dune에게 Dune version 3.4를 사용한다고 알려줍니다.
이제 dune build hello.exe 명령어를 입력하여 프로젝트를 빌드합니다.
dune exec ./hello.exe 명령어를 입력하여 빌드와 실행을 동시에 수행할 수 있습니다.
dune clean 명령어를 수행하여 빌드를 삭제할 수 있습니다.
마지막으로 dune build --watch 명령어를 수행하여 소스 코드가 변경될 때마다 자동으로 빌드가 수행되게 할 수 있습니다.
Expression
함수형 프로그래밍 언어에서는 expression을 value로 계산합니다. Value는 더 이상 계산이 필요없는 expression을 의미합니다. 그렇기에 모든 value는 expression이지만 그 역은 성립하지 않습니다.
Primitive Types and Values
int type
utop ### 26 + 1;;
- : int = 27
utop ### 26 - 1;;
- : int = 25
utop ### 32 * 2;;
- : int = 64
utop ### 32 / 2;;
- : int = 16
utop ### 17 mod 3;;
- : int = 2
float type(https://en.wikipedia.org/wiki/Double-precision_floating-point_format)
OCaml은 operator overloading을 지원하지 않습니다. 그렇기에 float type에 대한 연산자들은 int와 다르게 정의되어 있습니다. float literal과 마찬가지로 .이 추가로 붙게 됩니다.
utop ### 3.14 +. 2.;;
- : float = 5.14000000000000057
utop ### 3.14 -. 2.;;
- : float = 1.14000000000000012
utop ### 3.14 *. 2.0;;
- : float = 6.28
utop ### 3.14 /. 2.;;
- : float = 1.57
3.14 + 2.;; 을 실행할 수 있나요?
bool type
utop ### true;;
- : bool = true
utop ### false;;
- : bool = false
utop ### true && false;;
- : bool = false
utop ### true || false;;
- : bool = true
char type
Python과 다르게 char type과 string type이 구분되어 있습니다. single quotes를 사용함을 유의합시다.
utop ### 'a';;
- : char = 'a'
utop ### 'b';;
- : char = 'b'
utop ### 'Z';;
- : char = 'Z'
string type
Double quotes를 사용하여 string을 구성할 수 있습니다. Concatenation operator ^를 지원합니다.
utop ### "University";;
- : string = "University"
utop ### "University" ^ " of " ^ "Seoul";;
- : string = "University of Seoul"
아래와 같이 0-based indexing을 통해서 각각의 문자에 접근할 수 있습니다.
utop ### "abc".[0];;
- : char = 'a'
utop ### "abc".[2];;
- : char = 'c'
utop ### "abc".[3];;
Exception: Invalid_argument "index out of bounds".
type conversion
built-in functions를 사용해서 type conversion을 진행할 수 있습니다. 어떤 변환들이 가능한지 시도해봅니다.
utop ### char_of_int 64;;
- : char = '@'
utop ### int_of_char 'A';;
- : int = 65
utop ### float_of_int 3;;
- : float = 3.
utop ### string_of_bool false;;
- : string = "false"
Equality and Inequality Operators
Structural Equality
값이 같은지 확인합니다.
-
Python
==and!= -
OCaml
=and<>
Physical Equaliity
같은 메모리에 존재하는지 확인합니다.
-
Python
isandis not -
OCaml
==and!=
utop ### 3 = 2;;
- : bool = false
utop ### 3 <> 2;;
- : bool = true
utop ### [3] == [3];;
- : bool = false
utop ### [3] = [3];;
- : bool = true
Assertions
assert expression은 expression을 계산한 뒤 그 값이 false라면 exception을 raise합니다.
utop ### assert (2=3);;
Exception: Assert_failure ("//toplevel//", 1, 0).
utop ### assert (2=2);;
- : unit = ()
아래와 같이 unit test를 수행할 때 사용할 수 있습니다.
let () = assert (f input1 = output1)
let () = assert (f input2 = output2)
let () = assert (f input3 = output3)
If Expressions
if e1 then e2 else e3은 e1이 true이면 e2로 value가 정해지고 false라면 e3로 정해집니다. 이때 e2와 e3의 type은 같아야 합니다. 우리는 e1을 if expression의 guard라고 합니다. 맨 마지막 else 는 반드시 입력해주어야 합니다.
utop ### if 3 > 2 then "yeah" else "boo";;
- : string = "yeah"
utop ### let color = "red";;
val color : string = "red"
utop ### if color = "red" then 0
       else if color = "blue" then 1
       else if color = "green" then 2
       else -1;;
- : int = 0
expression은 value를 산출하며 if expression도 마찬가지로 value를 산출합니다. if statements가 아닌 if expressions이기에 value를 산출한다는 점을 유의합시다.
utop ### let make_it_even x = x + if x mod 2 = 0 then 0 else 1;;
val make_it_even : int -> int = <fun>
utop ### make_it_even 2;;
- : int = 2
utop ### make_it_even 3;;
- : int = 4
Let Expressions
지금까지의 let 사용은 let definition입니다. let expression을 살펴보겠습니다. let expression은 value를 name에 bind하고 그 bind된 값을 다른 expression을 계산하는데 사용합니다.
(* let definition *);;
utop ### let x = 42;;
val x : int = 42
(* let expression *);;
utop ### let x = 42 in x + 1;;
- : int = 43
let expression은 expression이기에 값을 산출합니다. let definition은 값을 산출하지 않습니다.
utop ### (let x = 42) + 1;;
Error: Syntax error
utop ### (let x = 42 in x) + 1;;
- : int = 43
let x = e1 in e2 에서 e1을 binding expression, e2를 body expression이라고 합니다. 여기서 x는 identifier로 보통 snake_case가 CamelCase보다 선호됩니다. e1을 계산하고 그 value를 e2에서 x가 쓰이는 자리에 치환합니다.
    let x = 1 + 4 in x * 3
-->   (evaluate e1 to a value v1)
    let x = 5 in x * 3
-->   (substitute v1 for x in e2, yielding e2')
    5 * 3
-->   (evaluate e2' to v2)
    15
      (result of evaluation is v2)
Scope
아래 코드가 어떻게 실행될까요?
let x = 5 in
  ((let x = 6 in x) + x)
x에 새로운 binding이 생긴다면 기존의 값은 가려지게 됩니다. 하지만 두 번째 let expression의 scope에서 벗어나면 다시 기존 binding을 되찾게 됩니다.
let x = 5 in
  ((let x = 6 in 6) + 5)
Type Annotations
(expression : type)으로 명시적으로 type을 표기할 수 있습니다. 이는 Python의 type hint와 유사합니다.
utop ### let x : int = 42;;
val x : int = 42
Functions
Function Definitions
Non-recursive function은 다음과 같이 정의합니다. 이때, 따로 type을 명시하지 않았지만 2가 더해질 수 있는 x의 type은 int뿐이라는 정보를 사용하여 f는 int를 입력으로 받아서 int를 출력하는 함수라고 type이 추론됩니다. 이를 type inference라고 하며 statically-typed인 OCaml의 특성을 보여줍니다.
utop ### let f x = x + 2;;
val f : int -> int = <fun>
위에서 배운 type annotations를 사용하여 명시적으로 type을 명세할 수도 있습니다.
utop ### let f (x: int) : int = x + 2;;
val f : int -> int = <fun>
Recursive function (재귀 함수)는 다음과 같이 정의합니다.
utop ### let rec sum n = if n <= 0 then 0 else sum (n-1) + n;;
val sum : int -> int = <fun>

Mutually Recursive functions는 and keyword를 사용하여 정의할 수 있습니다. even을 정의하기 위해 odd의 정의가 필요하고 odd를 정의하기 위해서 even의 정의가 필요한 상황입니다.
utop ### let rec even n = n = 0 || odd (n - 1)
and odd n = n <> 0 && even (n - 1);;
val even : int -> bool = <fun>
val odd : int -> bool = <fun>
Anonymous Functions
OCaml에서 value를 bind하지 않을 수 있는 것 처럼 함수도 특정 이름에 bind하지 않을 수 있습니다. 이를 anonymous function이라고 합니다. OCaml에서는 fun keyword를 사용하여 Anonymous function를 정의할 수 있습니다. 이는 identifier에 bind되지 않은 함수입니다. Anonymous function은 lambda expression이라고도 불립니다.
utop ### 42;;
- : int = 42
utop ### fun x -> x + 1;;
- : int -> int = <fun>
이를 사용하여 두 가지 방식으로 함수를 정의할 수 있습니다.
utop ### let inc x = x + 1;;
val inc : int -> int = <fun>
utop ### let inc = fun x -> x + 1;;
val inc : int -> int = <fun>
Pipeline
OCaml에서는 built-in infix operator를 활용해서 여러 함수를 순차적으로 적용할 수 있습니다. 이를 pipeline operator라고 합니다. 여러 함수를 순차적으로 적용할 때 매우 유용하게 사용할 수 있습니다.
utop ### let square x = x * x;;
val square : int -> int = <fun>
utop ### 5 |> inc |> square |> inc |> inc |> square;;
- : int = 1444
utop ### square (inc (inc (square (inc 5))));;
- : int = 1444
Polymorphic Functions
Identity function을 정의해보겠습니다. 이때 'a는 alpha로 읽으며 type variable이라고 합니다. 이 함수는 여러 type에 사용될 수 있습니다. 이 함수를 여러 type의 value에 적용할 수 있으므로 이를 polymorphic function이라고 합니다.
utop ### let identity_function x = x;;
val identity_function : 'a -> 'a = <fun>
utop ### identity_function 42;;
- : int = 42
utop ### identity_function true;;
- : bool = true
utop ### identity_function "cida";;
- : string = "cida"
아래 예제에서는 반대로 type variable이 OCaml의 타입 추론 알고리즘에 의해 특정 type으로 bind되는 것을 볼 수 있습니다.
utop ### let increment : 'a -> 'a = fun x -> x + 1;;
val increment : int -> int = <fun>
type annotations를 사용하여 polymorphic function에 제약을 가할 수 있습니다. 가령, 아래 코드는 identity_function이 int에 대해서만 작동하도록 합니다.
utop ### let identity_function_int : int -> int = identity_function;;
val identity_function_int : int -> int = <fun>
utop ### identity_function_int 3;;
- : int = 3
utop ### identity_function_int false;;
Error: This expression has type bool but an expression was expected of type int
Labeled and Optional Arguments
OCaml은 labeled arguments를 지원합니다. 이때 arguments들의 순서는 중요하지 않습니다.
utop ### let build_full_name ~first_name:arg1 ~last_name:arg2 = arg1 ^ " " ^ arg2;;
val build_full_name : first_name:string -> last_name:string -> string = <fun>
utop ### build_full_name ~first_name:"Seongmin" ~last_name:"Kim";;
- : string = "Seongmin Kim"
utop ### build_full_name ~last_name: "Ko" ~first_name:"Sang-Ki";;
- : string = "Sang-Ki Ko"
위의 예제에서 first_name과 last_name은 label이고 arg1과 arg2는 variable name입니다. 이 두 개가 같을 수 있고 같을 때 더 쉽게 코딩할 수 있도록 syntactic sugar form을 지원합니다.
utop ### let build_full_name ~first_name:first_name ~last_name:last_name = first_name ^ " " ^ last_name;;
val build_full_name : first_name:string -> last_name:string -> string = <fun>
utop ### let build_full_name ~first_name ~last_name = first_name ^ " " ^ last_name;;
val build_full_name : first_name:string -> last_name:string -> string = <fun>
위의 예제에서 concat operator (^)가 쓰이는 것을 토대로 OCaml은 인자들이 string이라는 것을 유추합니다. 이를 명시적으로 표기하려면 다음과 같이 할 수 있습니다.
utop ### let build_full_name ~first_name:(arg1 : string) ~last_name:(arg2 : string) = arg1 ^ " " ^ arg2;;
val build_full_name : first_name:string -> last_name:string -> string = <fun>
Optional argument는 다음과 같이 지정할 수 있습니다. Optional arguement 없이 함수를 호출했을 경우에는 default value가 사용됩니다. 이때 optional arguement는 명시적으로 label을 붙여주어야 합니다.
utop ### let f ?gate:(arg1=0) arg2 = arg1 * arg2;;
val f : ?gate:int -> int -> int = <fun>
utop ### f 7;;
- : int = 0
utop ### f 1 7;;
Error: The function applied to this argument has type ?gate:int -> int
This argument cannot be applied without label
utop ### f ~gate:1 7;;
- : int = 7
Partial Application
모든 OCaml 함수는 오직 하나의 argument만을 받습니다. add_x는 int를 입력으로 받아 int → int 함수를 출력합니다. 즉, int → int → int는 int → (int → int)로 볼 수 있습니다. 이를 통해 우리는 OCaml이 함수를 입력으로 받거나 출력할 수 있음을 알 수 있습니다.
utop ### let add x y = x + y;;
val add : int -> int -> int = <fun>
utop ### let add_x x = fun y -> x + y;;
val add_x : int -> int -> int = <fun>
다음 예제를 통해 명시적으로 이것을 확인할 수 있습니다. 이것을 partial application이라고 합니다.
utop ### let add x y = x + y;;
val add : int -> int -> int = <fun>
utop ### let add_5 = add 5;;
val add_5 : int -> int = <fun>
utop ### add_5 2;;
- : int = 7
Operators as Functions
infix operator들은 prefix operator로도 작동할 수 있습니다.
utop ### ( + );;
- : int -> int -> int = <fun>
utop ### ( ^ );;
- : string -> string -> string = <fun>
utop ### ( + ) 3 4;;
- : int = 7
utop ### ( ^ ) "Seongmin" "Kim";;
- : string = "SeongminKim"
utop ### let add3 = ( + ) 3;;
val add3 : int -> int = <fun>
utop ### add3 2;;
- : int = 5
Custom infix operator를 정의할 수도 있습니다.
utop ### let ( ^^ ) x y = max x y;;
val ( ^^ ) : 'a -> 'a -> 'a = <fun>
utop ### 27 ^^ 51;;
- : int = 51
Tail Recursion
수업 시간에 배웠던 다음 함수를 OCaml로 구현해보겠습니다.
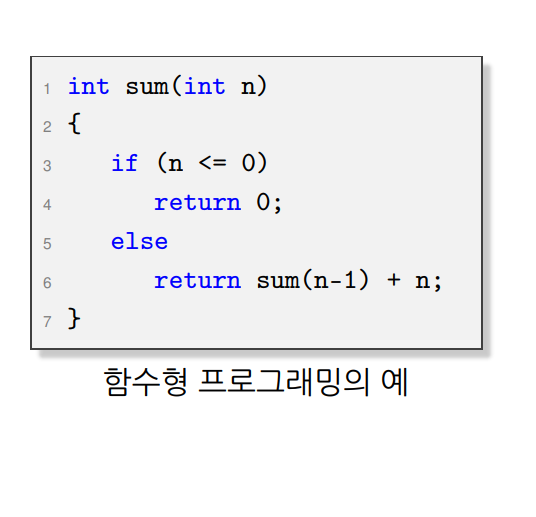
utop ### let rec sum n = if n <= 0 then 0 else sum (n - 1) + n;;
val sum : int -> int = <fun>
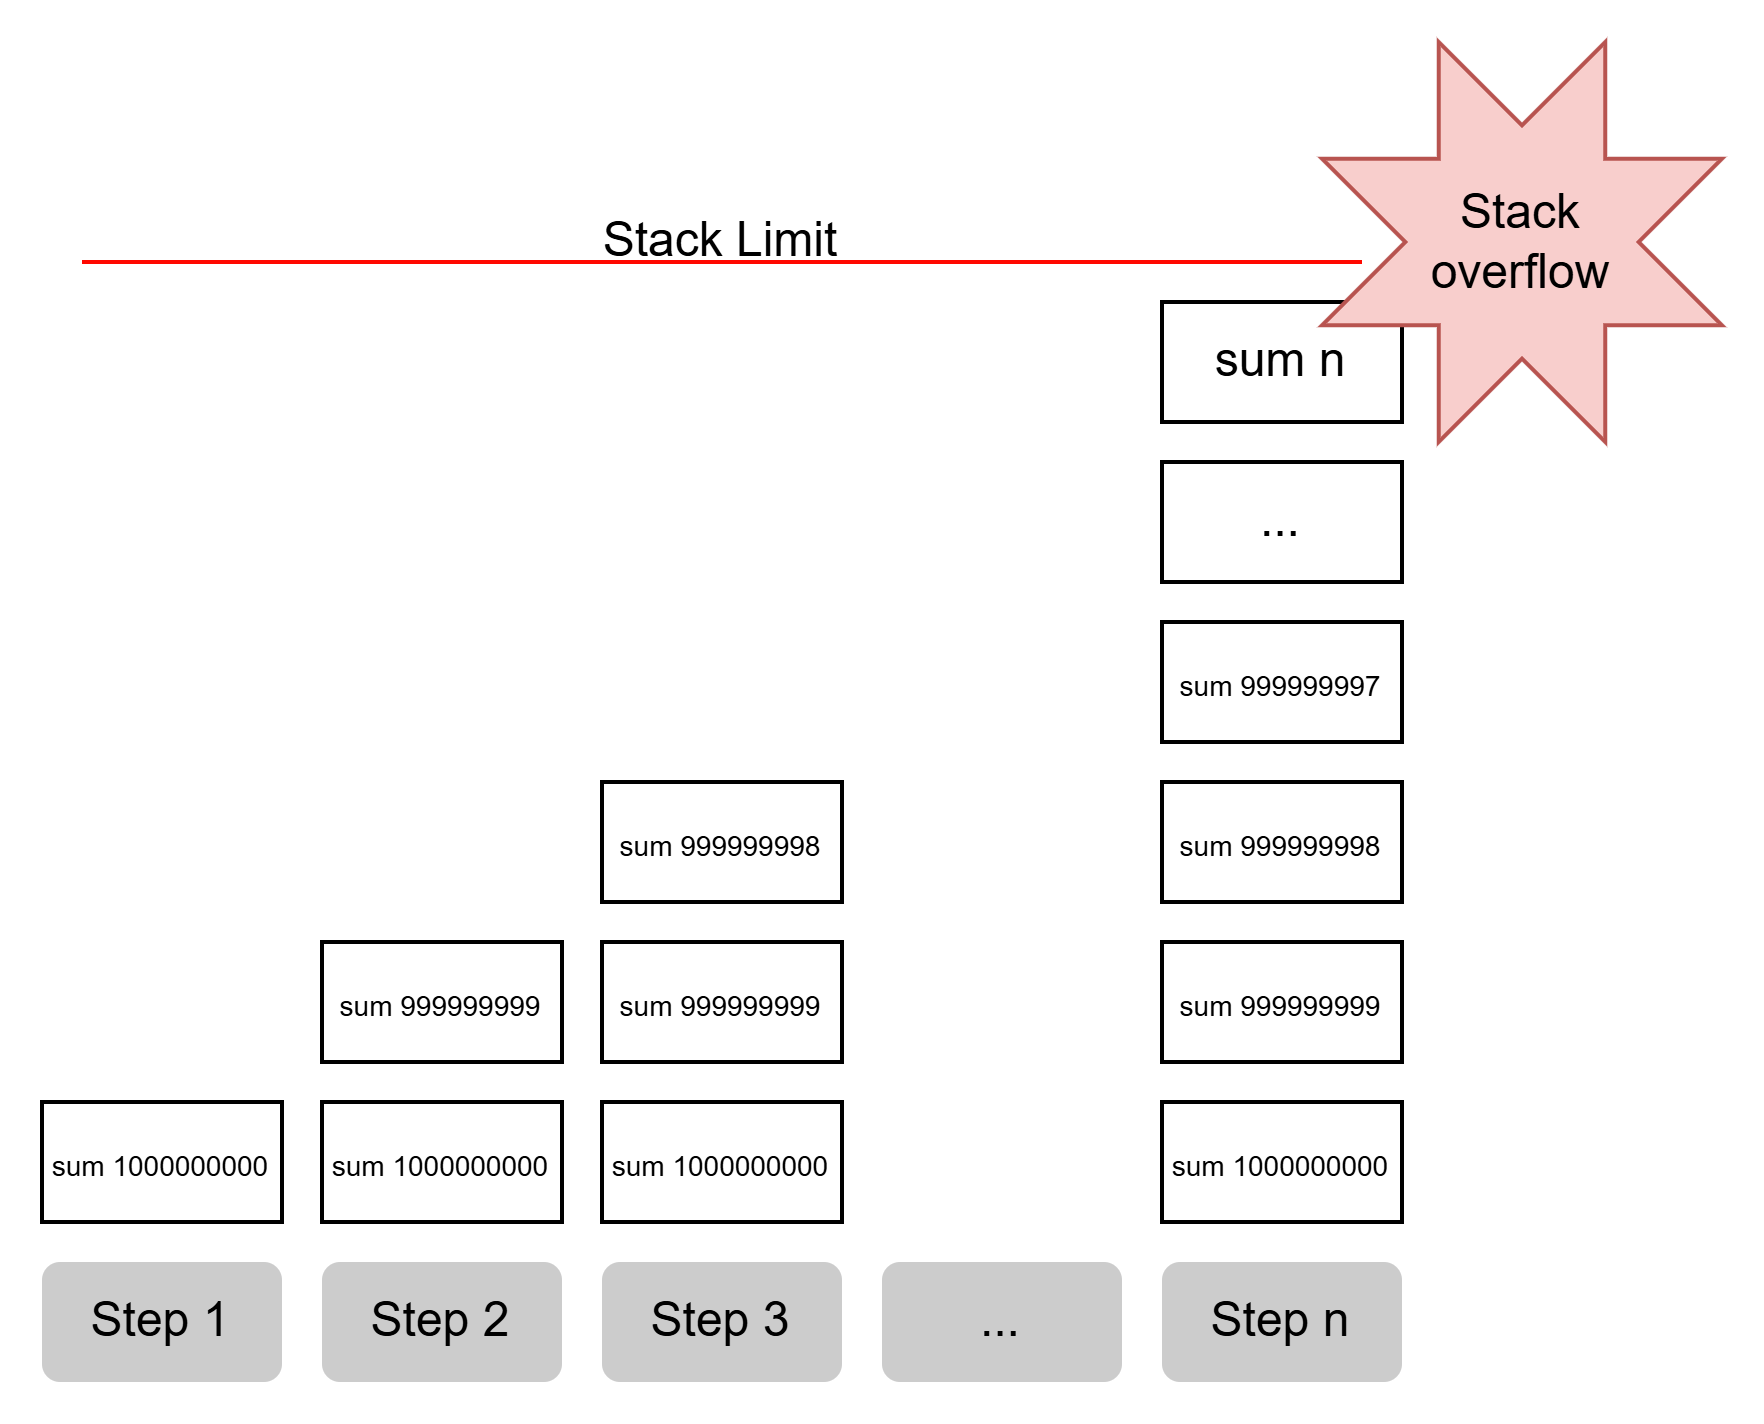
작은 인수에 대해서는 문제없이 작동했지만 인수가 $10^9$를 넘어가니 error가 발생합니다.
utop ### sum 10;;
- : int = 55
utop ### sum 100_000;;
- : int = 5000050000
utop ### sum 1_000_000;;
- : int = 500000500000
utop ### sum 1_000_000_000;;
Stack overflow during evaluation (looping recursion?).
이는 함수 호출을 실행할 때마다 메모리에 Stack frame이 추가되기 때문입니다. 이 문제는 recursion 부분이 끝나고 다시 계산을 하는 부분이 있기 때문입니다. 그렇기에 현재 stack frame을 유지해야 합니다. 무엇을 더해야 하는지 ( + n 부분)을 기억해야 하기 때문입니다.
이러한 문제는 tail recursion으로 해결할 수 있습니다. 이는 recursion이 끝나고 더 계산할 것이 없도록 하는 것입니다. 코드를 다음과 같이 수정해보겠습니다. 아까와는 다르게 큰 인수에 대해서도 문제를 잘 해결하는 모습을 보여줍니다.
utop ### let rec sum_helper n acc = if n <= 0 then acc else sum_helper (n - 1) (acc + n);;
val sum_helper : int -> int -> int = <fun>
utop ### let sum n = sum_helper n 0;;
val sum : int -> int = <fun>
utop ### sum 1_000_000_000;;
- : int = 500000000500000000
위 함수는 accumulator 인자를 추가하여 recursive call이 끝난 후에 추가적인 계산이 필요없도록 하였습니다. Compiler는 이 코드를 보고 tail recursion임을 인지한 후 하나의 stack frame을 계속해서 사용합니다. 이 과정을 tail-call optimization이라고 합니다.
Printing
print_endline 함수는 new line character \n를 포함해서 문자열을 출력합니다. 이것말고도 print_char, print_string, print_int 그리고 print_float등 다양한 함수들이 있습니다.
type unit은 오직 하나의 value ()만을 가지며 다른 언어의 void나 None처럼 작동합니다.
utop ### print_endline "Hello, World!";;
Hello, World!
- : unit = ()
utop ### print_endline;;
- : string -> unit = <fun>
semicolon을 사용하여 unit type을 return하는 함수들을 하나로 묶을 수 있습니다.
utop ### print_endline "Camels";
print_endline "are";
print_endline "bae";;
Camels
are
bae
- : unit = ()
하지만 unit이 아닌 것에 semicolon을 사용해서 묶으면 경고를 받습니다.
utop ### 3; 5;;
Line 1, characters 0-1:
Warning 10 [non-unit-statement]: this expression should have type unit.

Line 1, characters 0-1:
Warning 10 [non-unit-statement]: this expression should have type unit.

- : int = 5
이럴때는 build-in function인 ignore을 사용해서 해결할 수 있습니다.
utop ### ignore;;
- : 'a -> unit = <fun>
utop ### (ignore 3); 5;;
- : int = 5
Printf
Printf 모듈을 사용하면 printf 함수를 사용할 수 있습니다.
utop ### Printf.printf "%s %i %f" "string" 123 123.;;
string 123 123.000000- : unit = ()
혹은 sprintf 함수로 문자열로 저장할 수 있습니다.
utop ### Printf.sprintf "%s %i %f" "string" 123 123.;;
- : string = "string 123 123.000000"
Lists
OCaml의 list는 Python과 다르게 모두 같은 type을 가져야 합니다. []은 empty list를 의미하며 nil이라고 발음합니다. list와 element가 주어졌을 때, elt :: lst로 element를 list 맨 앞에 추가할 수 있습니다. 이때 ::를 cons라고 합니다. [1; 2; 3; 4]는 cons와 nil로도 쓰일 수 있습니다. 그렇기에 이 syntax는 syntactic sugar입니다.
utop ### [];;
- : 'a list = []
utop ### 1 :: [];;
- : int list = [1]
utop ### [1; 2; 3; 4];;
- : int list = [1; 2; 3; 4]
utop ### 1 :: 2 :: 3 :: 4 :: [];;
- : int list = [1; 2; 3; 4]
OCaml의 list는 linked list이기에 indexing을 통한 접근이 불가능합니다. 그렇기에 우리는 list가 nil과 cons로만 이루어졌다는 것을 이용하여 pattern matching을 통해 접근합니다. 여기서 cons operator의 정의에 따라서 h (head)는 element를 t(tail)는 나머지 list를 의미합니다. 이때 각각의 pattern → expression을 branch 혹은 case라고 합니다.
utop ### let rec sum lst =
  match lst with
  | [] -> 0
  | h :: t -> h + sum t;;
val sum : int list -> int = <fun>
let rec length lst =
  match lst with
  | [] -> 0
  | h :: t -> 1 + length t
let rec append lst1 lst2 =
  match lst1 with
  | [] -> lst2
  | h :: t -> h :: append t lst2
Built-in operator @를 사용하여 두 list를 이을 수 있습니다.
utop ### [1; 2] @ [3; 4];;
- : int list = [1; 2; 3; 4]
utop ### ( @ ) [1; 2] [3; 4];;
- : int list = [1; 2; 3; 4]
다른 모든 것들이 OCaml에서 그러하듯이 list 또한 immutable합니다. list에 값을 추가하는 것은 사실 기존 list에서 값을 추가한 새로운 list를 반환하는 것입니다.
아래와 같이 마지막 인자에 대해서 바로 pattern matching을 수행하는 경우 OCaml은 syntactic sugar 형태를 지원합니다.
let rec sum lst =
  match lst with
  | [] -> 0
  | h :: t -> h + sum t
let rec sum = function
  | [] -> 0
  | h :: t -> h + sum t
Variants
Variant는 여러 값중에 하나의 값을 가질 수 있는 type입니다. 이때 variant안의 value들의 이름을 constructors라고 합니다.
utop ### type day = Sun | Mon | Tue | Wed | Thu | Fri | Sat;;
type day = Sun | Mon | Tue | Wed | Thu | Fri | Sat
utop ### let d = Tue;;
val d : day = Tue
pattern matching 기능을 쓰면 쉽게 constructor에 따른 행동을 정의할 수 있습니다.
let int_of_day d =
  match d with
  | Sun -> 1
  | Mon -> 2
  | Tue -> 3
  | Wed -> 4
  | Thu -> 5
  | Fri -> 6
  | Sat -> 7
val int_of_day : day -> int = <fun>
utop ### int_of_day d;;
- : int = 3
Records
Record는 여러 type의 data로 이루어집니다. 이때 record 안에 있는 요소들을 field라고 합니다. student record는 name과 gpa라는 field를 가지고 있습니다.
utop ### type student = {name : string; gpa : float};;
type student = { name : string; gpa : float; }
utop ### let seongmin = {name  = "Seongminkim"; gpa = 2.2};;
val seongmin : student = {name = "Seongminkim"; gpa = 2.2}
record에서 특정 field에 접근하기 위해서는 dot notation을 사용합니다.
utop ### seongmin.gpa;;
- : float = 2.2
혹은 패턴 매칭을 활용할 수도 있습니다. 여기서 n과 g는 pattern variables로 만약 field name과 같게 한다면 생략해도 괜찮습니다.
utop ### match seongmin with {name = n; gpa = g} -> g;;
- : float = 2.2
utop ### match seongmin with {name; gpa} -> gpa;;
- : float = 2.2
아래와 같이 record에서 특정 field의 값을 바꾼 값을 만들 수도 있습니다.
utop ### let minsu = {seongmin with name = "Minsukim"};;
val minsu : student = {name = "Minsukim"; gpa = 2.2}
Tuples
Tuple은 record와 마찬가지로 서로 다른 type들을 조합해서 만들어집니다. 하지만 record와 다르게 이름으로 요소들에 접근하는 것이 아닌 position으로 요소들에 접근합니다. 이때 type은 각 type들의 곱으로 나타납니다. Cartesian product를 생각하시면 됩니다.
utop ### (1, 2, 10);;
- : int * int * int = (1, 2, 10)
utop ### (true, "Hello");;
- : bool * string = (true, "Hello")
pattern match는 다음과 같이 진행할 수 있습니다.
utop ### match (1, 2, 3) with (x, y, z) -> x + y + z;;
- : int = 6
Options
Option은 type constructor로 type을 입력으로 받아 새로운 type을 생산합니다. 하지만 option 자체는 type이 아닙니다. option으로 만들어진 type은 두 가지 상태를 가질 수 있습니다.
utop ### Some 42;;
- : int option = Some 42
utop ### None;;
- : 'a option = None
Option은 패턴 매칭으로 쉽게 판별할 수 있습니다.
utop ### let extract o =
    match o with
    | Some i -> string_of_int i
    | None -> "";;
val extract : int option -> string = <fun>
이러한 Option은 다음과 같이 빈 list에서 max 값을 반환하는 등의 상황에서 활용될 수 있습니다.
utop ### let rec list_max = function
    | [] -> None
    | h :: t -> begin
        match list_max t with
        | None -> Some h
        | Some m -> Some (max h m)
    end;;
val list_max : 'a list -> 'a option = <fun>